
Hoppy Easter! 6 Adorable Spring Crafts Perfect for All Ages
- Amy Harry
- Apr 24, 2025
- 6 min read

Spring has sprung—and so has the creativity in our classroom! With Easter just around the corner, we’ve been diving into some festive craft projects that brought lots of color, giggles, and a healthy dose of glue stick fun and you can do it from your classroom or home too! We have 6 easy, fun and creative crafts for you to try.
Here’s a peek at what we’ve been up to:
Easter Egg Wreath
This sweet wreath was made by cutting out and decorating pastel-colored paper eggs, each one unique with zigzags, polka dots, squiggles and personalised drawings. The star of the show? A charming bunny face smiling right in the center. This craft was a great way to practice fine motor skills and pattern design—plus, it makes a lovely spring-themed wall decoration!

Here’s how we did it
Materials:
Colored paper (pastel shades work best)
White paper (for bunny face)
Scissors
Glue stick or glue
Black marker
Pink crayon or marker
Steps:
Cut Out Eggs Cut 8–10 egg shapes from colored paper. Each egg should be about the size of your palm. *TIP - make a template to draw around so all eggs are the same.
Decorate the Eggs Use markers or crayons to decorate each egg with lines, dots, zigzags, or any pattern you like. My students especially like personalising them with their favourite characters, sports teams and animals.
Make a Circle Now comes the slightly difficult part. Arrange your eggs in a circle to form a wreath. Glue them together where they touch. Remember to keep an eye as some students will need help with this as the eggs sometimes move around and then don’t meet well. Leave space in the middle at the bottom for your rabbit egg.
Create the Bunny Face Cut an egg from white paper for the bunny’s head. Draw eyes, a nose, a smiling mouth, and add pink cheeks. You can also cut two long ears and glue them behind the circle.
Glue Bunny to the Centre Place the bunny face in the middle of your egg wreath and glue it down.
Let It Dry & Hang It Up! Once dry, your wreath is ready to display!
Handprint Folded Bunny Picture
How cute are these handprint folded bunnies? Students created bright colourful bunny bodies from their own handprints, then added hand-drawn faces and decorations with markers and stickers. Each card featured a festive “Hoppy Easter” message.This project was a fun combo of origami, drawing, and Easter cheer.

What you’ll need
Materials:
A4 colored paper or card
Scissors
Glue stick
Markers or crayons
Googly eyes or stickers (optional)
Steps:
Make your Bunnies Put hand on paper and draw around it. Be sure to draw down the wrist a little too. Cut it out and round off the bottom of the hand. Cut off the middle finger and bend in the thumb and little finger to make the rabbits arms. Do this twice, so you have two.
Add Bunny Details Draw or cut and glue the details of your bunny, like the stomach and inner ears. Then draw a cute little face.
Write a Message Stick your hand print bunnies onto a piece of card or paper and write Hoppy Easter above or below them.
Add Final Decorations Decorate your picture by adding confetti, bunting or drawing little eggs and carrots, or decorate with glitter. (personally I hate glitter - too much mess!)
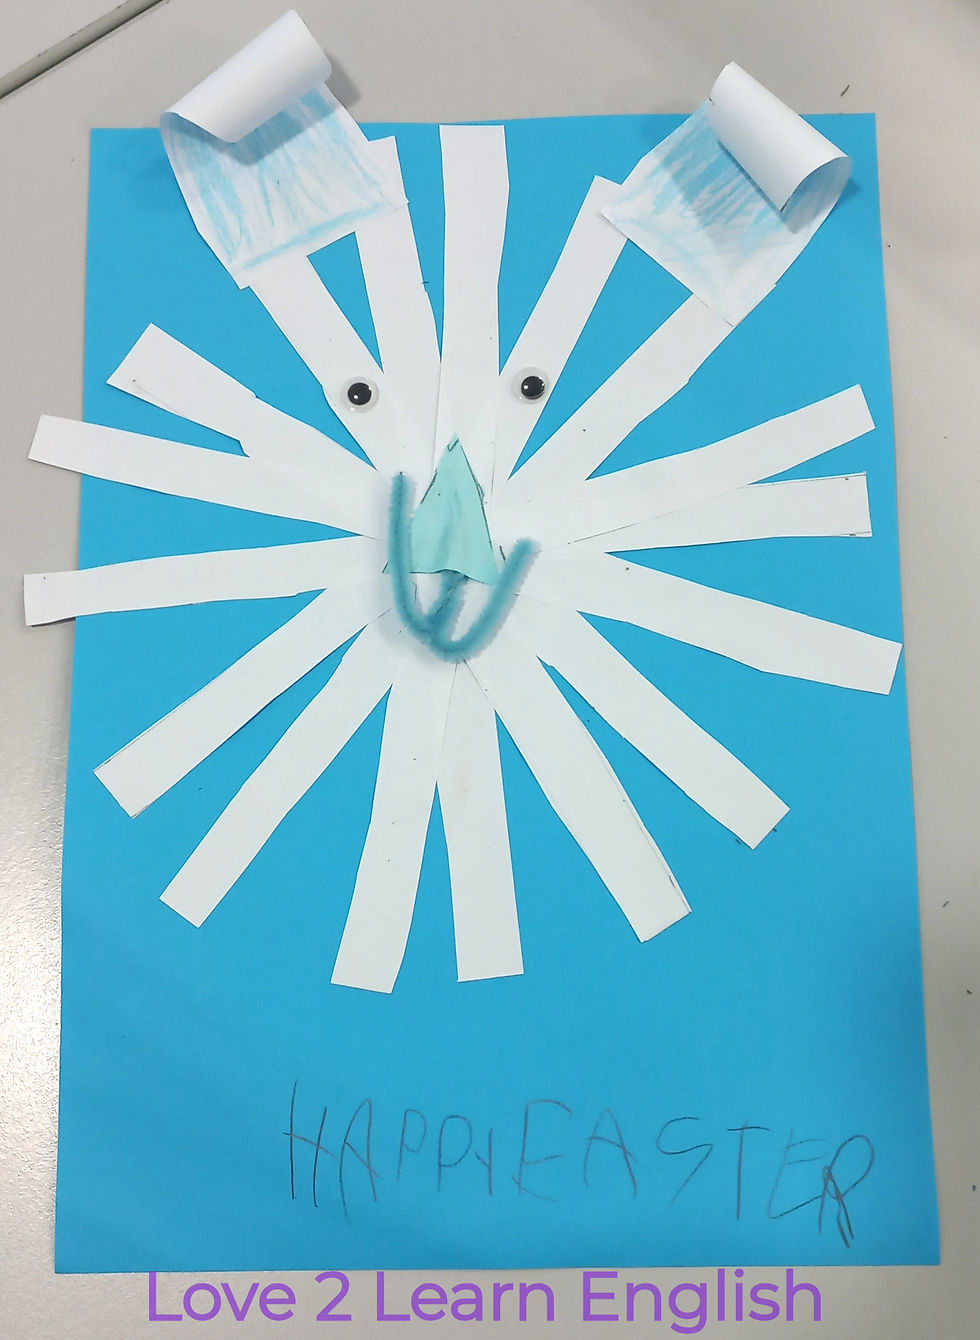
Bunny Face Collage
This one was a classroom favourite! Using strips of white paper radiating from the centre, students created a bunny face complete with a triangle nose, pipe cleaner smile, and googly eyes. The floppy ears, curled for volume, gave it a burst of personality. Underneath it all, they wrote "HAPPY EASTER" in their own handwriting—what a sweet personal touch!
This is how to do it
Materials:
Strips of white paper (about 1 cm wide, 13 cm long) Older kids can cut for themselves, but I always pre cut mine.
A4 colored card (for the background)
Scissors
Glue stick
Googly eyes
Pink triangle nose (paper or foam)
Black pipe cleaner or black paper (for mouth)
Marker
Steps:
Make the Bunny Face Base Take 8-10 white paper strips. Glue each strip down starting vertically and then continuing around the colored background like a clock, so they spread out like a sunburst.
Add the Face
Glue googly eyes to the center.
Add a small pink triangle for the nose.
Use a black pipe cleaner or draw a smile underneath the nose.
Make the Ears Cut two long ear shapes from white paper and curl or bend them slightly by wrapping them around a pencil. Glue them on to the head.
Write a Greeting At the bottom, write “HAPPY EASTER” in big letters.
Display and Enjoy! Let everything dry, then hang your fluffy bunny proudly!
Readers Theater | Easter Activity | Reading Fluency | ESL Activity
Buy Now
Pop-Up Easter Egg Card
A fun surprise card that pops open to reveal a decorated egg and cheerful Easter message! Perfect for all ages to complete and looks pretty cool although it’s easy to do.

Let’s go
Materials:
A4 coloured card
Markers, pens, or crayons
Scissors
Steps:
Fold your card in half to form the card base.
Draw the egg. On the folded side, draw half an egg. Try to keep the middle of it quite flat.
Cut it out. Think of the egg in three parts, the two curved parts and the flatish middle part. Cut from the outside curved parts into the egg. Stop at the flat part and do not cut it.
Open the card and push the egg through.
Draw a banner shape that extends across the middle of the egg, and write your Easter message on it.
Add extra decorations around the card like confetti, musical notes, or spring doodles.
Tip: For younger children, you can pre-cut the egg and banner shapes to simplify the process.
Bunny Silhouette Paint Art
A vibrant painting with a surprise bunny shape revealed in the middle! Great for little fingers and looks very effective and stylish.

Here’s what you do
Materials:
White A4 card
Bunny silhouette (cut from card)
Paint
Blu Tac
Baby wipes
Markers
Steps:
Place your bunny silhouette in the centre of the card. Fix it with the Blu tac so it stays in place.
Use paint to swipe around the silhouette. Bright, spring colours work beautifully—use your fingers to add paint around the edge of the bunny and swipe outwards from the bunny shape.
Fill the whole background with paint swipes, leaving the bunny untouched in the middle.
Once the paint dries a little, carefully remove the bunny silhouette.
Write “Happy Easter” at the top or add any extra details around your bunny!
Tip: This activity is great for fine motor development and colour exploration.
Bunny Face Mask with Cotton Balls
Transform into a bunny with this adorable and easy-to-make mask that kids absolutely love! Using cotton balls to make the fur and pink card for the whiskers you will have a cute little bunny face in no time.

Materials:
Paper plate
Cotton balls
Pink paper (for whiskers)
White paper (for ears)
Pink crayon or pencil
Craft stick or popsicle stick
Scissors
Glue
Tape
Steps:
Cut a hole in the middle of the paper plate big enough for a child’s face to peek through.
Glue cotton balls around the rim of the hole to create the bunny’s fluffy face.
Cut out two bunny ears from white paper. Colour the inside pink, then glue them to the top of the plate.
Cut three thin strips of pink paper for each side and glue them as whiskers.
Tape a popsicle stick to the bottom of the plate so it can be held like a mask.
Hold it up and hop around!
Why These Crafts Work So Well
These Easter activities are not only cute—they’re also brilliant for early learners and older students. Through each project, students practiced:
Cutting and folding (fine motor development)
Creative expression (color choices and decoration)
Following multi-step instructions (great for ESL learners!)
Celebrating the season in a fun and inclusive way
Crafting brings language and learning to life—especially when there are bunnies and chocolate eggs involved!
Do you have a favourite Easter craft? Or a twist on any of these ideas? Share it in the comments.
Happy crafting—and Hoppy Easter!


Comments